Maternity Robes for Photoshoot: A Complete Styling Guide
You're standing in front of the closet with a beautiful maternity robe in one hand and three unanswered questions in the other. Will it hide the bump, show too much under the studio lights, drag on the floor, or look like ordinary loungewear instead of a deliberate portrait garment? The right robe can solve those problems, but only if you choose it for the story of the session, not because it looks soft online.
Maternity photography has long carried a tension between concealment and visibility. Pregnancy portraits were relatively common in England from the 1560s to about 1630, then became rare for centuries before returning to mainstream culture. Annie Leibovitz's 1991 portrait of seven-month-pregnant Demi Moore on the cover of Vanity Fair helped normalize maternity imagery as elegant, visible, and stylized, a shift that also made garments such as maternity robes feel intentional rather than purely practical. This historical and styling context is outlined by Mii Estilo.
A robe should frame your body, create movement, and support posing. It shouldn't swallow the shape you want photographed. Use the guidance below to choose between a quiet, minimal look and a high-drama editorial one, then test every decision before the camera arrives.
The Night Before the Shoot
The robe is hanging from the closet door, still wearing its tags. You've placed the shoes beside the bed, laid out jewelry on a folded towel, and set nude undergarments where you can reach them without opening every drawer. That small scene is more important than it looks. A calm morning starts with decisions made before you're tired, rushed, and trying to dress around a prominent bump.
Begin with the care label. Some robes tolerate a garment steamer, while delicate lace, chiffon, and charmeuse need more cautious handling. If the label permits steaming, hang the robe vertically from a wide hanger and work from the lower hem upward, keeping the steamer moving. A wide hanger helps prevent shoulder dents. If you're ironing a suitable fabric, place a clean pressing cloth between the iron and the robe, and avoid pressing directly over lace, trim, or glossy surfaces.
Build the outfit around the foundation
Set out nude briefs, a skin-tone bandeau or bralette, and any shapewear you plan to wear. Try the full foundation under the robe, not just the robe by itself. A garment that looks opaque in a bedroom can reveal a bra edge, seam, or bright elastic once it meets directional light.
Put every accessory beside the robe. Include the shoes, although barefoot portraits often suit a softer maternity story, and keep a backup option in your bag in case the fit or coverage feels wrong. A second robe, wrap, or simple gown gives your photographer a practical alternative without forcing you to improvise.
Practical rule: Make the final outfit decision while standing, sitting, and turning, not while looking at the robe on a hanger.
Get a full night of sleep and keep your evening routine comfortable. If you're prone to morning puffiness, avoid making late-night choices that leave you feeling swollen or uncomfortable, but don't compromise hydration or follow any restriction that conflicts with your medical advice. Your comfort matters more than a styling trick.
If you're comparing the polished, wardrobe-led feel of luxury maternity photo sessions, notice how much of the result depends on preparation rather than the garment alone. A robe that has been steamed, tested, and packed correctly lets you arrive ready to pose instead of troubleshooting a sleeve or tie.
Choosing Fabric and Color That Flatter
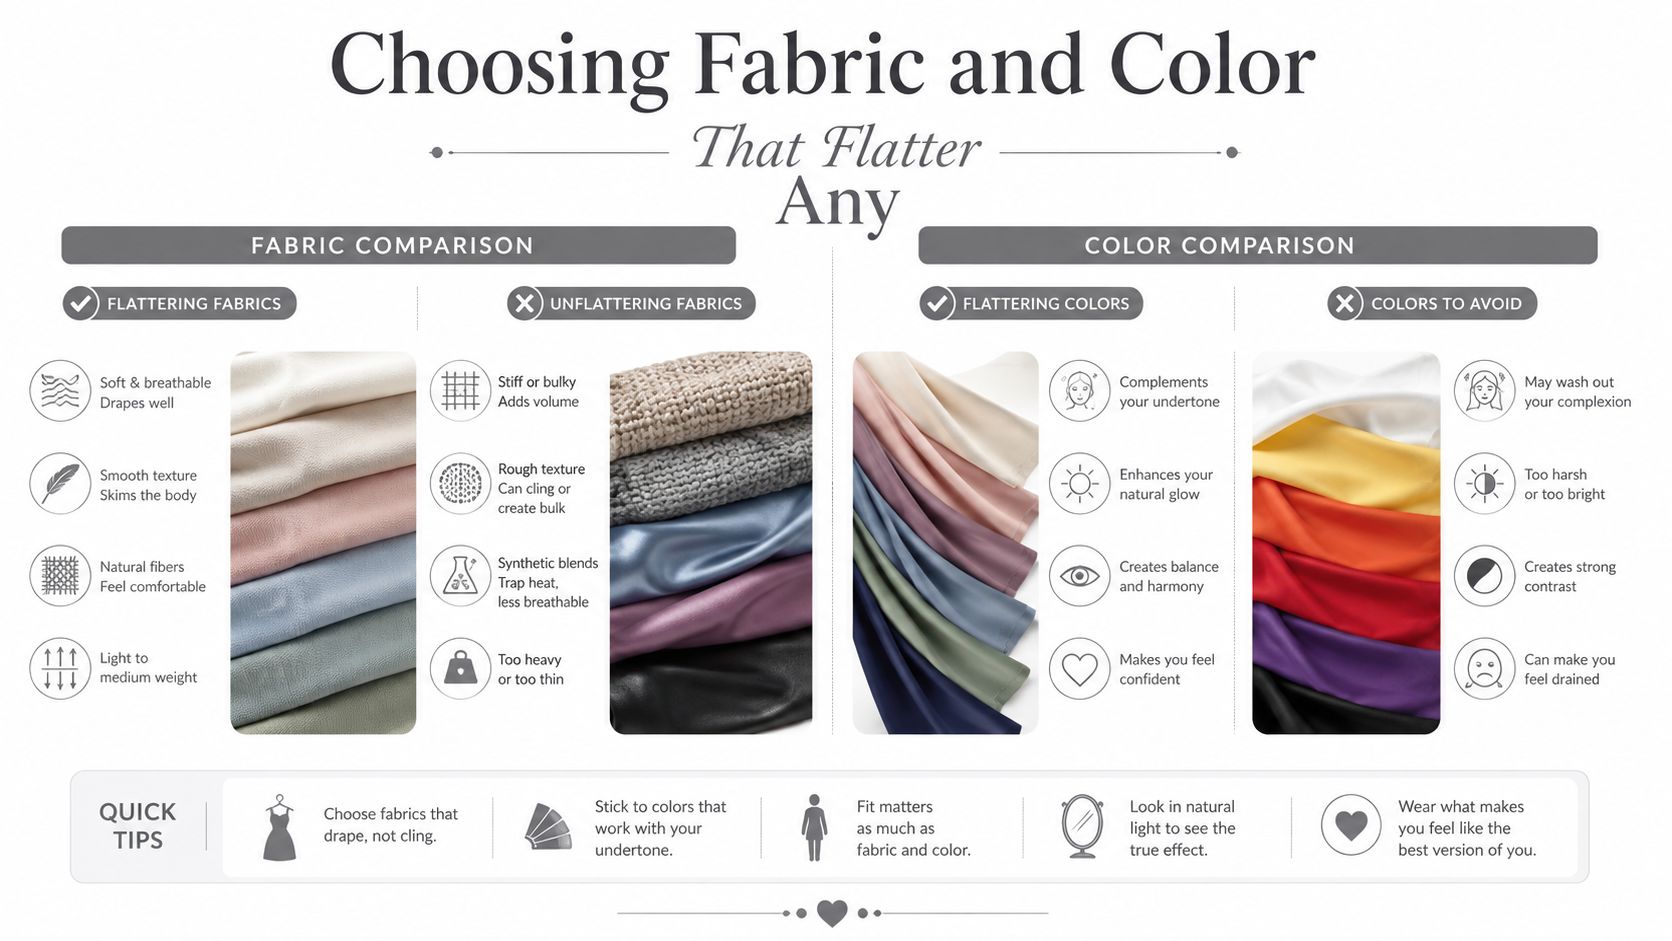
Fabric determines how the robe reads on camera. Decoration comes second. A robe with graceful movement creates shape around the bump, while a stiff or bulky one adds visual weight and makes every pose harder.
For an airy editorial result, start with lightweight satin, silk, stretch chiffon, or modal. These fabrics can catch light across the shoulder and belly while maintaining a soft outline. Chiffon feels especially delicate and photographs with movement, but it may reveal undergarments. Satin looks luxurious, although it can cling to body oil and show marks more readily. Modal falls gently against the body, but it may look flat if the lighting is too dim or directionless.
Avoid heavy velvet, stiff cotton sateen, and thick knits when the goal is to show the bump clearly. They can overwhelm the silhouette, restrict movement, or absorb enough light to make the robe look dense. Photography guides also favor neutral, drapey materials such as georgette, crepe, lace, and rayon, while cautioning against rigid denim, taffeta, brocade, and similarly structured fabrics that crease or limit motion. Water Bear Photography's maternity wardrobe guidance supports that movement-first approach.
Match color to the visual direction
For quiet minimal portraits, warm ivory, champagne, blush, and soft off-white create a gentle palette that keeps attention on expression and shape. Pure white can become harsh under bright lighting, so off-white usually gives the photographer more tonal detail to work with.
For high-drama portraits, emerald, plum, and deep navy create stronger separation against neutral backgrounds. Choose a jewel tone when the robe is meant to carry visual authority, then keep the rest of the styling disciplined. A bold color needs room around it.
Before ordering, check the studio wall, floor, and backdrop. Don't choose a robe that sits in the same color family as the background unless your photographer specifically wants a blended, tonal image. The robe should either contrast cleanly or create a deliberate monochromatic effect. For additional color and complexion guidance, use this robe selection guide for skin tone and mood.
Sizing and Fit for the Bump
A robe is camera-ready only when it survives movement. Online measurements can help, but they can't show whether the shoulder pulls when you sit or whether the tie lands across the widest part of your bump. Test the robe in the same room where you keep your shoes and accessories, then repeat the movements in the order your photographer is likely to use them.
Run the four-movement test
Sit first. Lower yourself into a chair and watch the front panels. The fabric should drape over the bump without pulling at the shoulders or gaping across the chest. Sitting exposes tight upper sleeves, weak closures, and foundations that become visible when the robe shifts.
Walk next. Cross the room at an ordinary pace. Check the hemline and make sure it won't catch beneath your feet. A robe that looks elegant while stationary can shorten your silhouette or create a fall risk once you move.
Lift both arms overhead. This tests sleeve cut, neckline security, and shoulder mobility. If the robe climbs sharply, exposes the bra, or pulls the neckline away from the body, the photographer will spend the session correcting the garment instead of directing your pose.
Turn slowly. Face the camera, rotate to the side, and continue toward a back view. Check back coverage and tie placement. A waist tie that lands across the fullest part of the bump can visually divide it, while a loose or poorly positioned tie may cause the front to open at the wrong moment.
A good fit supports your posture. If you're constantly holding the robe in place, the garment is directing the portrait instead of serving it.
Order according to your current bust and hip measurements, not your pre-pregnancy size. Maternity cuts vary, and a larger label won't fix a robe with narrow shoulders or an awkward closure. Test it at the same hour as the session when possible, especially if your body feels different later in the day.
For a more detailed way to think through measurements and ease, use this robe size guide from small through XXL. The practical benchmark is simple: you should be able to sit, walk, lift your arms, and turn without an assistant repeatedly pulling fabric into place.
How to Style the Robe as a Hero Piece
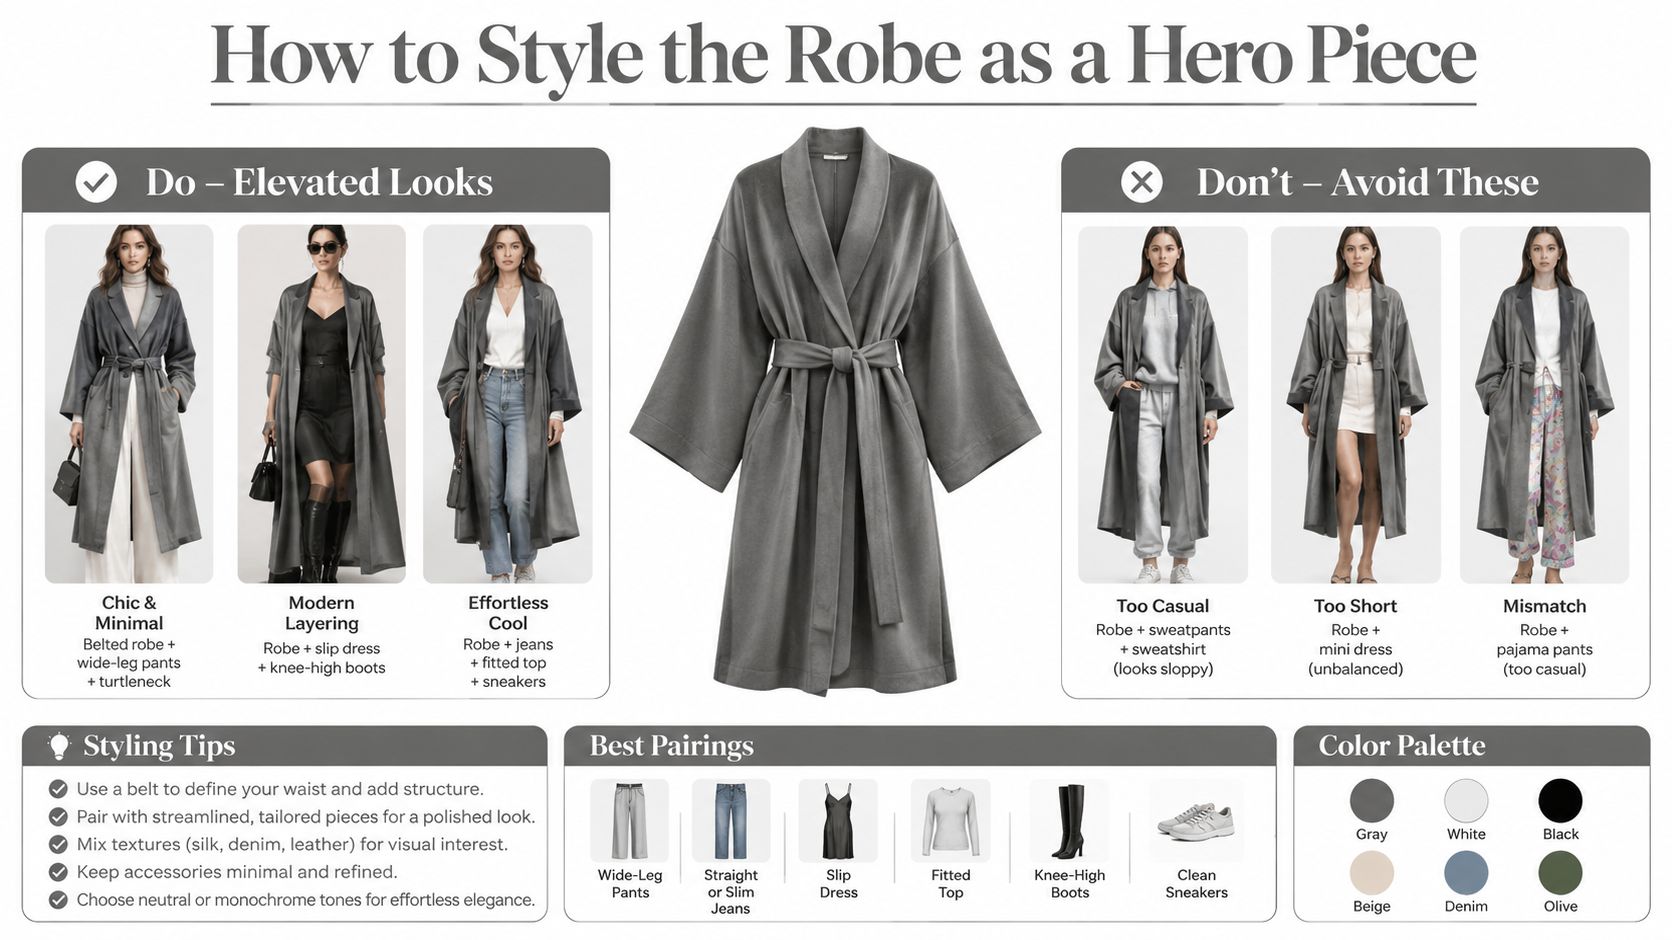
Stop treating the robe as a cover-up you throw on between outfits. In a strong maternity portrait, it functions as texture, line, and silhouette. A shapeless robe hides the very curve the session was designed to celebrate, while a considered robe can create a frame around the belly and guide the viewer's eye.
Make three decisions before you arrive.
First, decide where the robe sits on your shoulders. Worn securely on both shoulders, it reads polished and composed. Dropped slightly from one shoulder, it feels more relaxed and editorial, but only if the neckline remains secure and the foundation stays invisible.
Second, choose the front treatment. An open front reveals the bump and creates vertical lines. A robe closed at the empire or under-bust line provides more coverage while preserving definition. Don't cinch it at the widest point. That tie placement can cut the bump in half and create an unflattering horizontal line.
Third, edit the accessories. Every item must strengthen the mood.
Choose one of two clear directions
A quiet minimal look might use a solid ivory robe, one delicate pendant, soft tousled hair, and bare feet. The robe's movement does the visual work. Nothing competes with the belly or the expression.
A high-drama look could use jewel-tone silk, statement earrings, bare feet against dark flooring, and a stronger shoulder line. The robe becomes the hero garment, so the photographer can use shadow, contrast, and negative space without adding clutter.
Skip oversized belts, busy prints, sequins, glitter, and heavy embellishment. Busy surfaces fight skin texture and facial expression, while reflective details can create distracting highlights. Don't match the robe too closely to the backdrop unless a blended studio portrait is intentional.
The robe should frame the belly, not hide it. If an accessory doesn't clarify the mood, improve the silhouette, or add a purposeful point of light, leave it out.
Posing Tips That Work With Your Robe
The robe's construction should determine the pose. Don't force an open-front garment into a closed, compressed position or expect oversized sleeves to disappear neatly beside the body. Use the robe's architecture to create lines that support the bump.
For an open-front robe, stand in a three-quarter turn. Place one hand near the hip and lift the hem slightly so the fabric falls in a visible diagonal. That diagonal elongates the torso and exposes the bump's profile without requiring a dramatic gesture.
Ask your photographer for a cue such as:
“Tilt your chin toward the shoulder where you lifted the hem.”
That instruction connects the face to the fabric movement and keeps the pose from looking disconnected. Keep the lifted hand light. Gripping the robe too tightly creates bunching around the hip.
Let sleeves create negative space
Bishop, flutter, and balloon sleeves need room to spread. Seated poses work well because your arms can rest on or cradle the bump while the sleeves drape outward. The fabric then creates soft negative space around the belly instead of collapsing against your sides.
For a seated portrait, place one hand beneath the bump and the other above it, leaving the elbows relaxed. If the sleeve falls across the belly, move the forearm slightly outward rather than pulling the fabric away with your fingers. The aim is a clean frame, not a staged display of the sleeve.
Use the tie as a guide, not a restraint
With a wrap or tie-waist robe, stand straight on and loosen the tie slightly. Place one hand on the hip to part the front panels and show both the belly curve and the waist definition. A photographer can then adjust the opening by inches without rebuilding the outfit.
Avoid three common failures:
- Closed fronts: They can flatten the bump and erase the robe's vertical lines.
- Buried hands: They make the arms disappear and cause fabric to bunch at the wrists.
- Dragging hems: They create visual clutter below the frame and can become unsafe when you change position.
Before each pose, smooth the front panels, check the shoulder, and place the tie where it defines rather than divides. The best robe poses look effortless because the garment has already been positioned deliberately.
Hair, Makeup, and Lighting Considerations
Hair, makeup, and lighting must respond to the robe's surface. Treating them as separate choices can create competing highlights, lost neckline detail, or a color balance that changes from frame to frame.
With satin, charmeuse, and other high-luster robes, keep complexion makeup slightly more matte than usual. The fabric already reflects light across the shoulder and belly, so a very glossy forehead or cheek can pull attention away from the face. Soft, diffused window light or a large octagonal modifier creates smoother highlights than a small, hard source aimed directly at the robe.
Matte jersey, cotton, and lace absorb more light. Add controlled glow to the cheekbones and collarbones, then ask the photographer to watch the exposure on the robe. Technical studio guidance cautions against fabrics that look dull under controlled light, as well as high-gloss synthetics that can produce hot spots. Busy prints, sequins, and glitter also create reflections that are difficult to control in close-up work. This studio-focused wardrobe guide explains why texture needs balance, not maximum shine.
Let the neckline decide the hairstyle
Pull hair back when the robe has an open front, a low neckline, or statement earrings. This exposes the shoulders and keeps the face clear. Loose waves balance a high collar, ruffled lapel, or fuller sleeve by softening the upper frame.
Underwear deserves direct attention. Use nude briefs and a skin-tone bandeau or bralette beneath a deep V or open robe. Avoid visible straps, bright bra bands, and contrasting elastic beneath lace. Ask for a test frame under the actual session lighting, especially if the robe is sheer or pale.
Flag harsh overhead sunlight, mixed color temperatures, and unplanned backlighting before the shoot begins. Backlight can turn sheer fabric into a glowing silhouette, which is beautiful when intentional and distracting when it reveals every foundation layer.
Shoot-Day Prep, Care, and Transport Checklist
A robe can arrive wrinkle-free and still fail on location if it's packed beneath shoes, belts, or jewelry. Treat transport as part of styling. The goal is to preserve the shoulder line, neckline, and intended drape from the moment you leave home until the final pose.
Steam, cool, and pack in layers
Steam the robe at home the night before while it hangs vertically. Let it cool on a clean sheet so the fabric settles into its drape. Don't press an iron directly against lace, chiffon, or charmeuse.
Place the cooled robe in a zippered garment bag between sheets of acid-free tissue. The tissue reduces crushing and helps protect delicate surfaces. Keep the robe above undergarments, belts, and accessories rather than allowing hard items to press into the neckline.
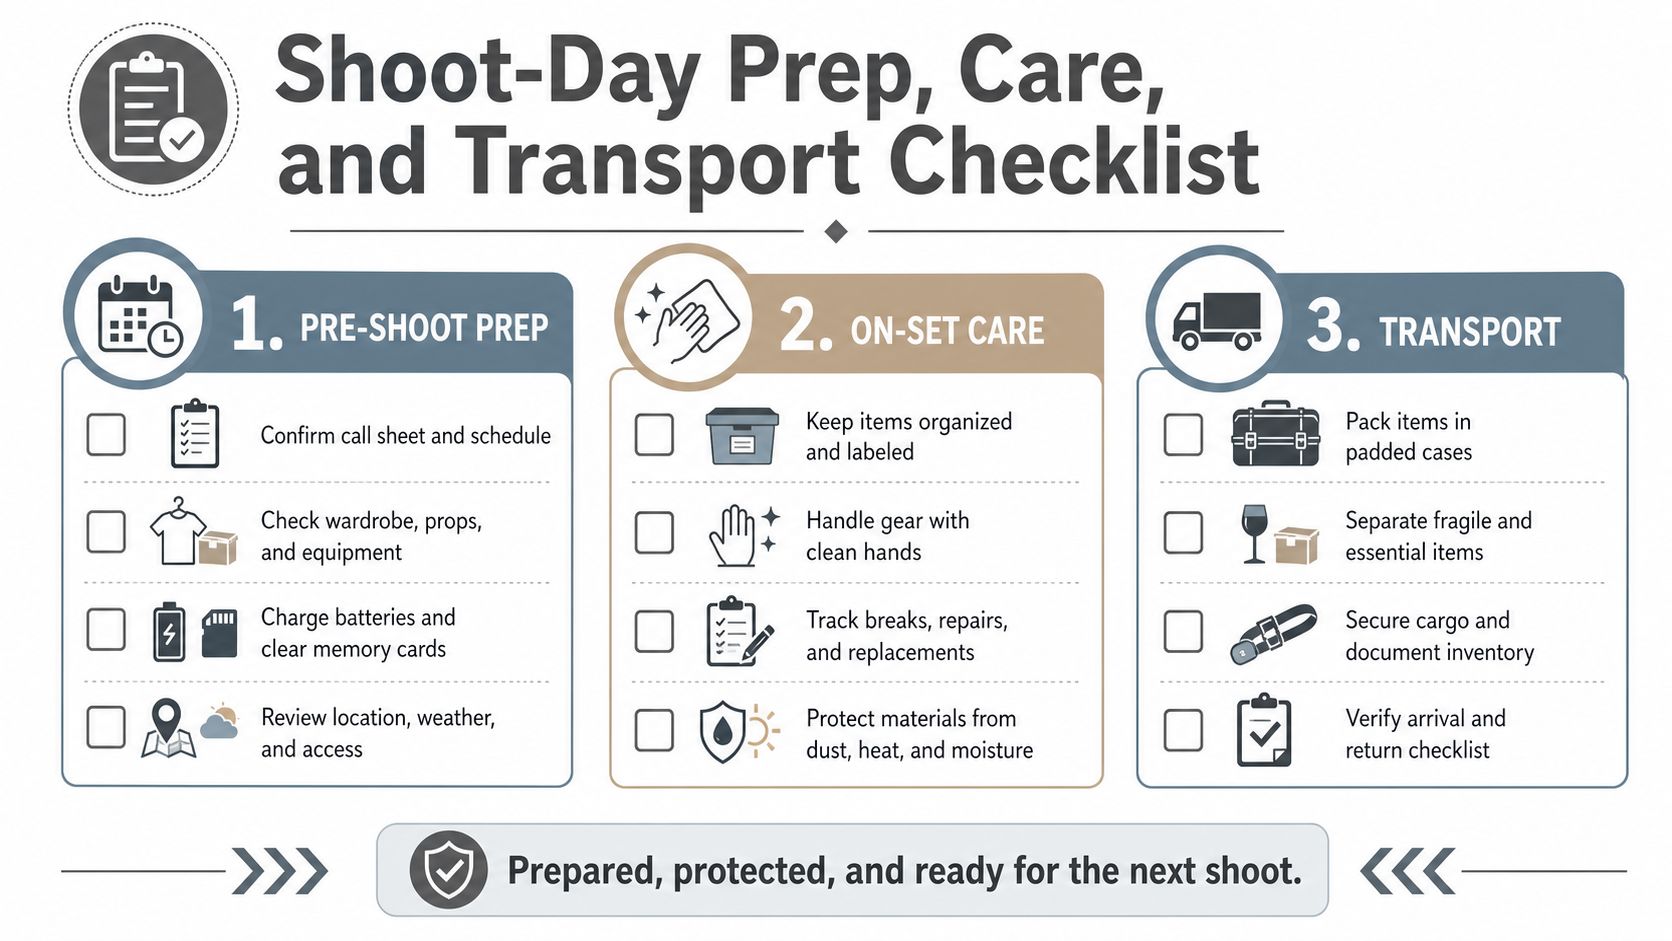
Pack a compact steamer, fabric-safe wrinkle spray, lint roller, and microfiber cloth. Keep small items in a tray or shallow bin so you can see the tie, brooch, pendant, and foundation pieces during the session instead of searching through a deep bag.
Use three pre-check moments
On arrival, steam the shoulders, sleeves, and front panels. Check the robe under the set's actual lighting, not only near the changing area.
At the first outfit change, inspect buttons, ties, closures, and brooches. A loose fastener can shift during a seated pose.
After every washroom break, reset the shoulder position, tie placement, and hem. Late-pregnancy bodies need comfort adjustments, but those adjustments should happen before the next frame.
Transport the garment away from car-door edges and crowded equipment caddies. Don't wedge the garment bag beneath heavy cases, and don't leave the robe folded in a hot vehicle longer than necessary. A simple printed card showing tie options and refolding instructions can help everyone return the garment to its intended shape.
If beauty preparation is part of your plan, schedule it with the same care as wardrobe. Guidance on brows and lashes during pregnancy can help you discuss suitable services and timing before the session. For washing and storage after the shoot, follow this robe care guide so the fabric remains ready for future use.
The commercial demand behind these garments is substantial. Grand View Research projects the broader maternity and childwear sector to reach about $93.9 billion by 2030, with roughly 4.7% compound annual growth from 2024 to 2030. The market projection is documented by Grand View Research. A separate estimate places maternity wear at about $21.05 billion in 2023, with a projection of about $35.07 billion by 2032 and a CAGR near 5.9%, as reported in the same market overview. The scale explains why maternity robes have become a defined styling category rather than an improvised cover-up.
Choose the robe that matches your visual direction, test it through real movement, and pack it as carefully as you'd pack the camera-ready details of your outfit. SEYANTE offers maternity and women's robes in Turkish cotton terry and lightweight waffle weaves, giving you a practical option when you want comfortable coverage before or after the portrait portion of the session. Visit SEYANTE to explore robe styles and use the brand's sizing and care guidance before ordering.